Making a 30 character font (sort of) in ten minutes (or so)
1. Start a new Photoshop document which is 390 pixels by 60 pixels. (30=6x5; and we allow a 30x30 square for each character).
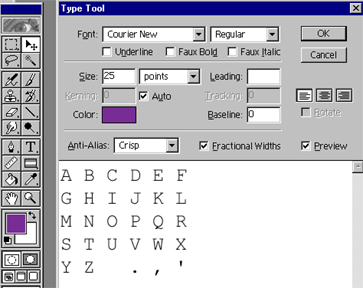
2. Use the type tool, pick your favorite color and choose a 25 pt font. Then type the alphabet together with { .,'}:
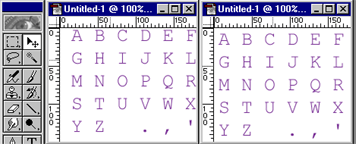
3. Use the move tool to align text on the page:
4. Flatten the image (layers menu); save in jpg format, and jump to Adobe ImageReady(from the file menu in Photoshop).
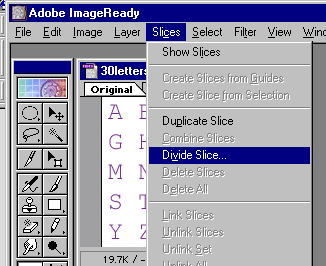
5. Choose Divide Slice from the slices menu:
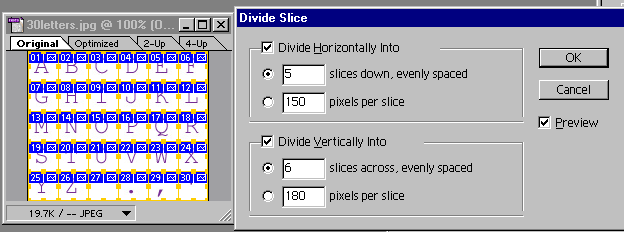
6. Divide into 30 pieces (6 wide by 5 high):
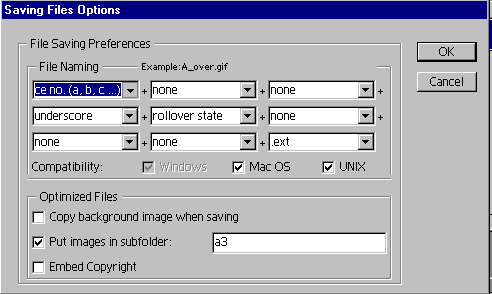
7. From the File menu, choose "save optimized as..."; then click on "saving file options".
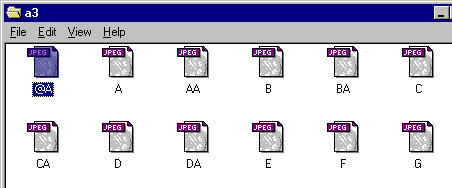
8. Name the slices with the letters of the alphabet and put in a subfolder:
9. Open the folder in which you've stored the slices, each file should be named after the letter depicted inside, except for {z space . , and '}. Rename "@A.jpg" to "Z.jpg". AA.jpg holds the space, BA.jpg holds the period, CA holds the comma and DA holds the apostrophe.
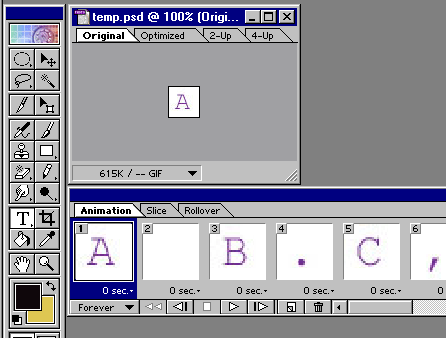
10. From within Image Ready choose "import folder as frames" from the file menu... point at the folder where the slices are stored:
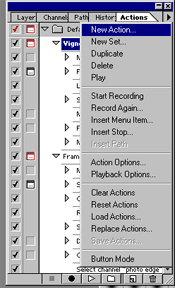
11. Jump back to Photoshop. Then create a special effect macro to apply to each letter (now shown in a separate layer of the document).
12. Choose the actions palette and make a new action. (You may have to get out of "button mode" before you can make a new action.):
13. Record a series of special effects actions in a new button; go back into button mode; apply it sequentially to each layer of the image.
14. You may want to hop back into Image Ready to save each of the files -- it might automate some of the work.