One approach to making a face:
A gradient or a "ramp" is the application to a region of shading which fades
gradually from one color to another. It is a handy way to create effects which mimick the
way light reflects off of surfaces.
Let's think about a face. It tends to be sort of an ellipsoid (a solid ellipse, or
alternatively a stretched sphere) with various things appended (like noses, lips and ears)
or carved into it, like eyes, nostrils and mouths. To be visible, the ellipsoid typically
has light shining off of it, typically, more light from above than below.
1. Let's start with an ellipsoid:
a. Make a new file that is, say, 300 pixels wide and 400 high.
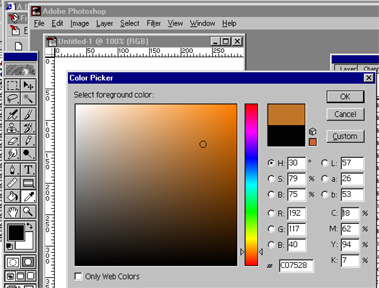
b. Choose a color that is sort of face-colored for the foreground, keeping white or
something lighter than the foreground color as the background.
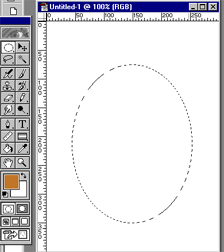
c. Use the circular marquis tool (by holding down the mouse on the
selection tool) to create an oval:
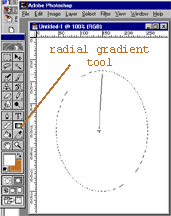
d. Switch foreground and background colors (by clicking on
the little arrow between the two) and get the radial gradient tool (by holding down
the mouse while clicking on the gradient tool).
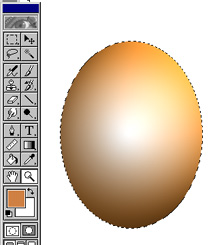
e. This should create your basic ellipsoid, complete with the illusion of 3-D depth.
Now let's add a light source. Use the built-in "lighting effects" to apply the
direction of a light source-- get to these from "render" under
"filters":
 :
:
result, still selected by marquis
f. You may wish to experiment with additional filters to provide texture to the egg
(face-to-be).
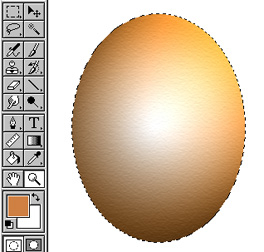
Using "texturizer/sandstone" from filters/texture.
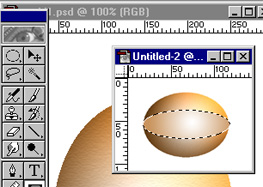
2. Now let's add some eyes.
a. Select the whole document and copy to the clipboard. Start a new
document so you won't contaminate the old "egg". Paste in the clipboard.
Deselect (ctrl D). Rotate 90 degrees, flip horizontal, and shrink. (All under the
"Image" menu, choose "Rotate canvas" -- for the rotate and flip -- and
then "image size" --making sure the "resample image" box is checked.).
Then carve out a narrower ellipse inside and apply a lighter colored radial gradient:
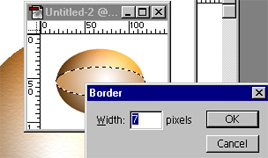
b. For the eyelashes, select the border of the current selection by using
Select/Modify/Border
1. 2.
2.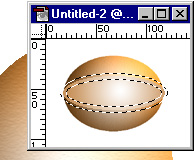
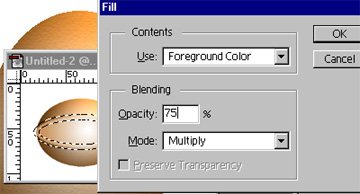
c. take the resulting selection and multiply by some reasonable shade of
eyelash, using fill from the edit menu:
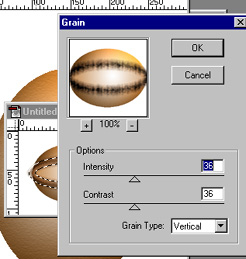
d. streak the selection vertically -- maybe try filter/texture/grain
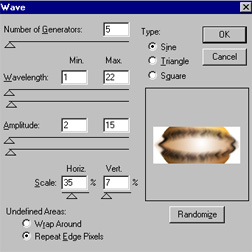
e. You may wish to apply a bit of curl to the lashes. After applying wave
(under filter/distort), you may find that the edges of the selection have been distorted,
and may need to be retouched by hand.
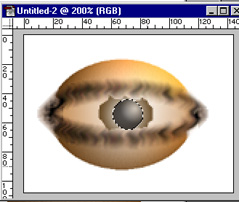
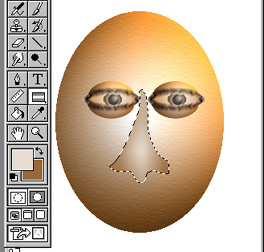
f. Zoom in for some close work and add in an iris (colored part) and a
pupil -- with curvature and lighting chosen appropriately.
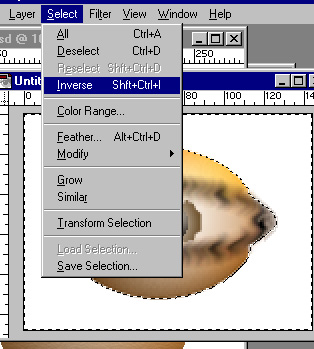
g. Now grab the eye and copy to the clipboard. One way to do this is use
the magic wand to select all the white pixels and then use Select/Inverse to get
everything else.
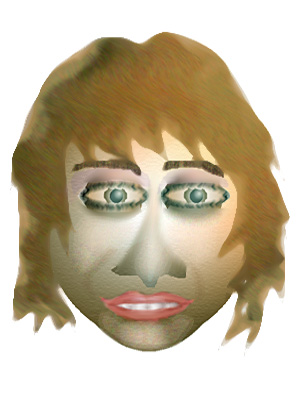
3. Paste the eye into the face twice... rescaling as needed by using CTRL- T. Later
you'll add things like noses, lips, and so forth.
 |
 |
 |
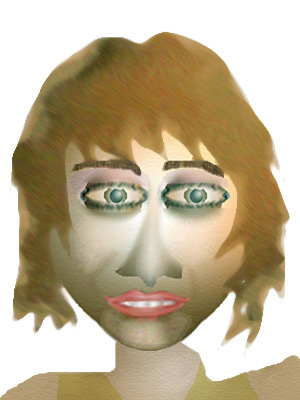
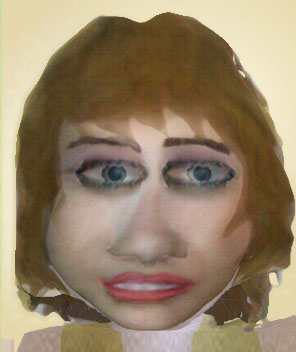
| adding facial features |
add a neck |
add hair;
play with colors and shape |
 |
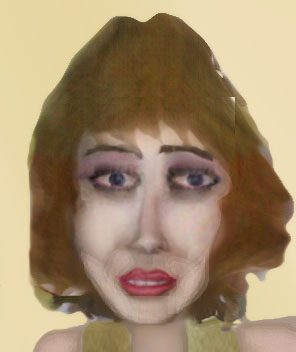 |
 |
| play with colors and shape |
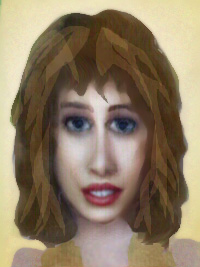
play with colors and shape |
play with colors and shape |