Exercise on circles and image resolution:
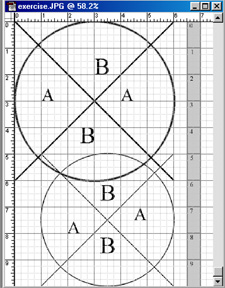
Create a file that looks like this when printed:
Hints: The circles are drawn under differing image resolutions, as are the fonts. The fonts are applied with and without antialiasing.
Special footnote: the crispest way in Photoshop I know to create a circle (the edge of which is differently colored that the interior) is as follows:
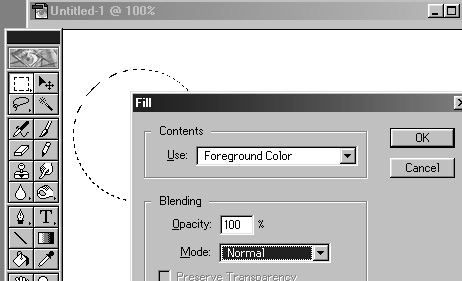
1. Change the Marquis tool to a circle and select a circular region (holding down the shift key) to constrain aspect ratio to 1.0 (i.e., keeping the oval's width and height equal).

2. Fill the selected region with the foreground color (using "Fill" from the "Edit" menu).
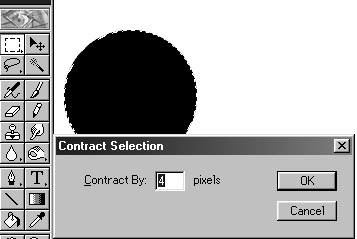
3. Now shrink the selection inward by going to Select/Modify/Contract. Shrink it inward by, say four pixels:
4. Now fill the contracted area with the background color, using Edit/Fill and choosing the bacground color (rather than the foreground) to do the filling.
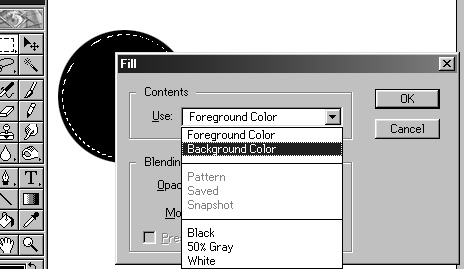
5. Observe the clarity of the anti-aliased edge, both on screen and as printed:
6. Extra credit for a better technique (using the same resolution).
* Note: I am seeking permission for use of Adobe® trademarks, screen shots, and the like as contained in various statements by that corporate entity (e.g. http://www.adobe.com/misc/pdfs/USGenExtTMdb022803.pdf, http://www.adobe.com/misc/permissions.html, http://www.adobe.com/misc/agreement.html, and http://www.adobe.com/misc/trademarks.html ) though the reader might wish to be aware that such permission statements do exist before replicating any marks associated with software companies.